Set Up Guide for Android
How To Install Stork Mobile eSIM
For Pixel 5 running Android 13. The actual text or screen display may vary depending on the Android version and the phone model.
01
Navigate to “Network and Internet”, then tap “+” next to SIMs

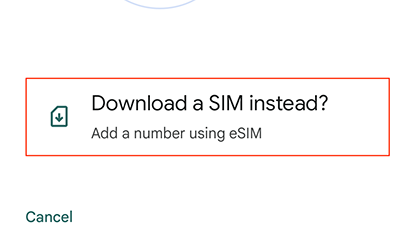
02
Tap “Download a SIM instead?”
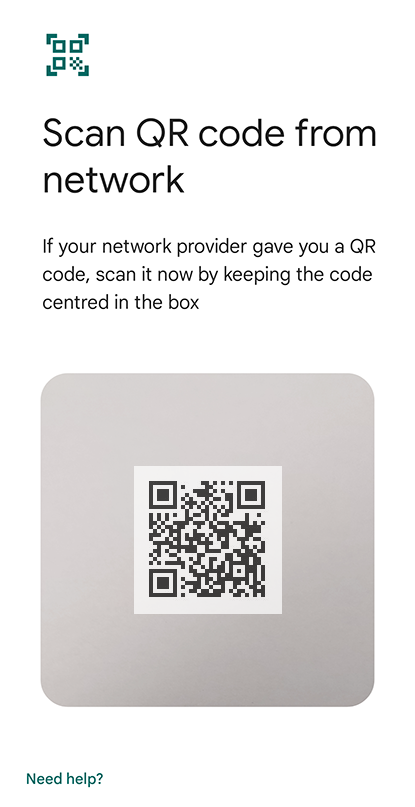
03
Scan QR code
* Internet connection required
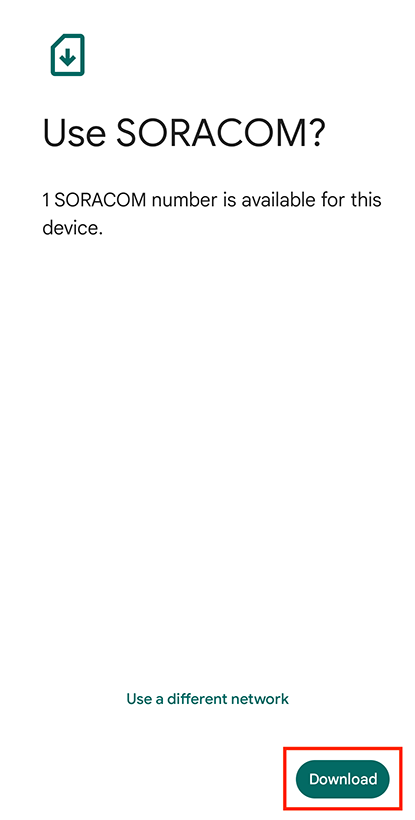
04
Tap “Download”
After the download is complete, tap on “Settings” displayed at the bottom right of the screen.
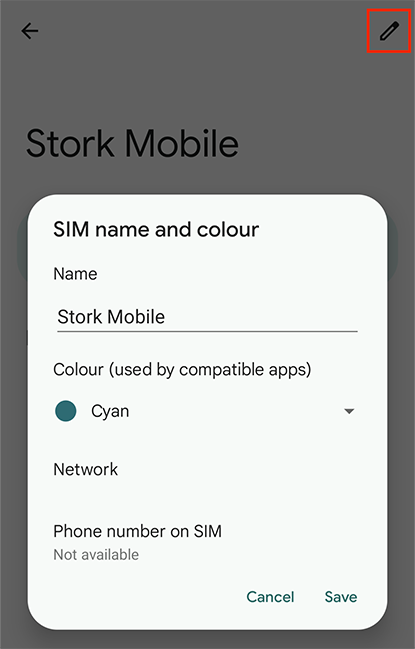
Optional
Change the name to “Stork Mobile”
From “SIMs”, tap on the downloaded eSIM named “SORACOM”. You can change the name from the pen (edit) icon at the top right.
How To Use Stork Mobile eSIM For Mobile Data
Follow these steps after you arrive at your travel destination.
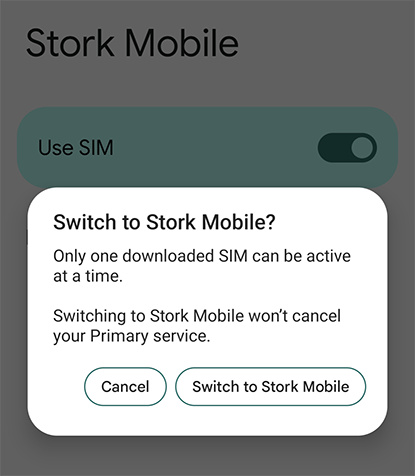
01
Turn on “Use SIM” for Stork Mobile
Depending on the device, it is possible to activate both one SIM and one eSIM at the same time, or two eSIMs simultaneously.
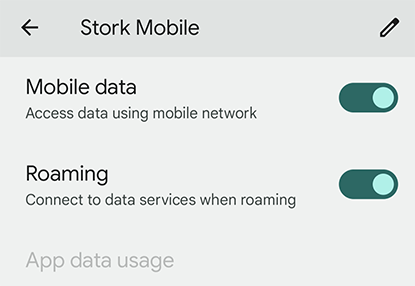
02
Enable both “Mobile data” and “Roaming”
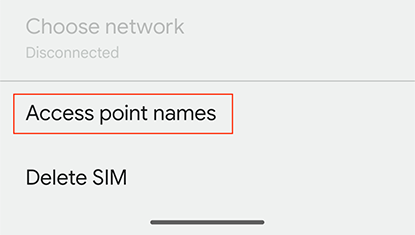
03
Tap “Access point names”, and create a new APN (Access Point Name) from “+”
04
Enter “Stork Mobile” for the Name and “stork” (all in lowercase) for the APN, then Save from the menu at the top right.

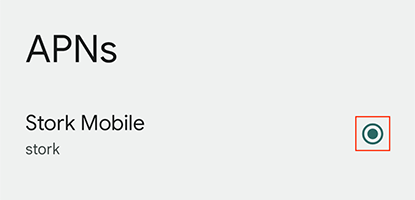
05
Select the APN you’ve just saved